Why it’s Important for Businesses
Reposting customer’s photos on your social media is not only a great way to strengthen the connection you have with your customers, but it also helps validate your brand with social proof.
One brand that does this extensively is MuscleTech.
Since they repost the best of their fans content, their customers are much more likely to post photos of the supplements they’re using, with hopes of being featured on the MuscleTech page.

In other words, they’re getting their customers to advertise for them. Genius.
In addition, those who visit the MuscleTech page can see that there are plenty of athletes buying their supplements, which adds social proof to the brand.
Now that you’re convinced of the value this brings, how can we go about reposting content on Instagram?
How It’s Done
Mobile – Regrann
We’ll start on mobile. Our app-of-choice is called Regrann, but you can play around with other ones to see which you prefer. Just search for “Instagram repost” apps.
Step 1: Simply download the app and make sure it’s set to “Always Stay Ready”.
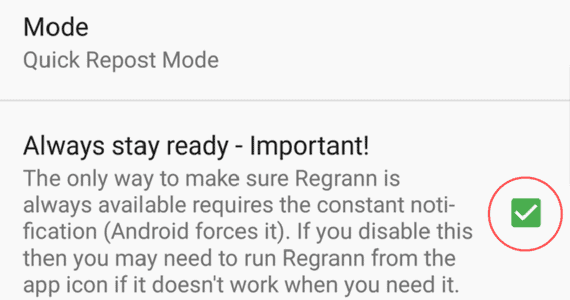
Step 2: Configure whether you want the app to simply save the photo, repost immediately, or repost later under the “Mode” tab.
Step 3: Go into Instagram and find a photo you’d like to repost. When you find one, click the three dots above the upper-right corner of the photo.
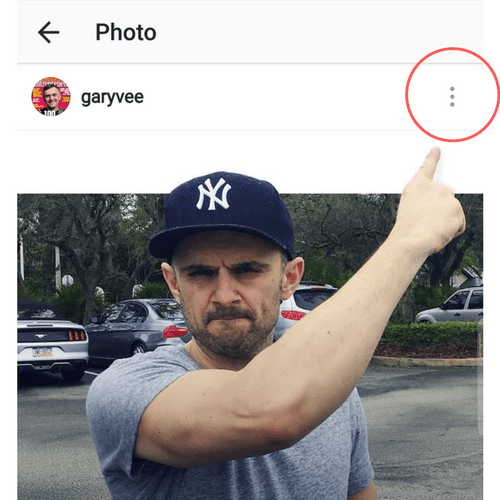
Step 4: Now tap “Copy Link”
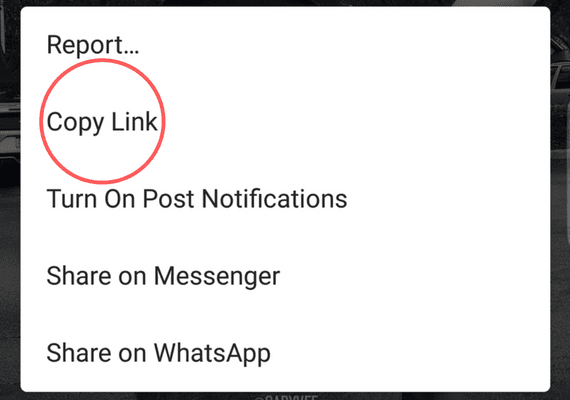
Step 5: If you have selected Quick Repost Mode, this will automatically upload the photo for you, and copy the caption to your phone’s clipboard. Simply size and style the photo. If you’d like, you can paste the previous caption back into the caption as well.
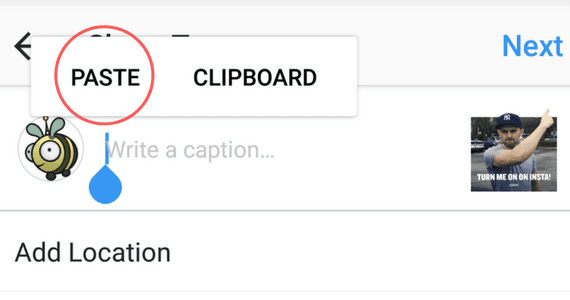
This mode, along with the Save mode, will save the photo to your device so you can then repost it on other social platforms.
Desktop – Downloadgram.com
If you’re reposting from a desktop, it’s even simpler.
Step 1: Find a photo you’d like to repost and copy the photo’s URL. Important: Make sure you click the photo and copy that url, and not just the url of the Instagram page.
Step 2: Post this url into downloadgram.com and click the big Download button. Now you’ve got the photo/video!

Don’t Be a Content Thief
Regardless of which way you choose to repost content, the most important thing to remember is to give credit to the original poster.
Without tagging or mentioning them in the post, you could run into some upset followers and potentially be tagged as a content “thief” by the Instagram community
Don’t be a content thief. Give credit where credit is due.
Interested in mastering your social media presence? Be sure to follow Honeypot’s Instagram page to receive tips and tricks that’ll bring your social media game to the next level.
Happy posting!
How To Save A Photo From Instagram – June 2013
One of the most effective types of content that will spur fan and consumer engagement is user-generated content.
When our fans create content and we re-post, feature and generally magnify their content we have a fantastic opportunity to create brand advocates and excitement.
In the world of photo sharing and social, there’s no better source for quality user generated photos than Instagram, recently purchased by Facebook, Instagram continues to grow at an astounding rate, giving us the opportunity to widen social influence and circles.
On that note, today we’re going to lead you through the steps to saving a photo from Instagram to your computer, keep in mind there are a few ways to achieve this depending on your platform.
This will allow us to share fan-driven source of content across all of your business social profiles.
First off, a few hard and fast rules with respect to user generated content, if we don’t do the following we risk the wrath and anger of our fans:
- Always provide attribution, meaning give the original creator of the content credit somewhere prominent in your re-posting.
- If possible, tag them or @ reply to them! A simple note in the comment section of Instagram goes a long way to building up goodwill, first compliment them and then ask if it’s cool to use their content and add it to your own photo album.
- You could also share their URL (see below) or their original post (if you saw it on Facebook first).
- Be humble and thankful for their content, people tend to be protective of their photographs. Be respectful of that!
- Never use images of people without their consent, less of a legal issue it’s simply the right thing to do.
Now that we know how to share content our customers, fans and their friends create, let’s get down to the “how” of grabbing these photos.
Method #1 – Firefox Required!
Find the image you’d like to share and open it up in a new browser window, Instagram has a handy web view now so that should be relatively easy.
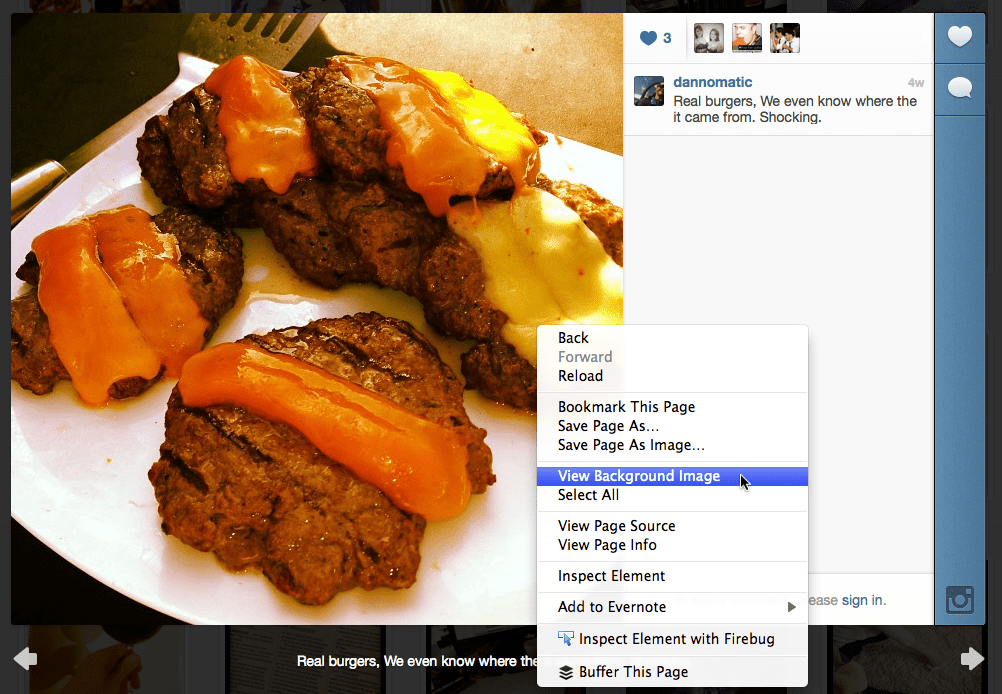
2. Right click on the image, you’ll see a menu appear and the menu item: View Background Image. It’ll look something like this:
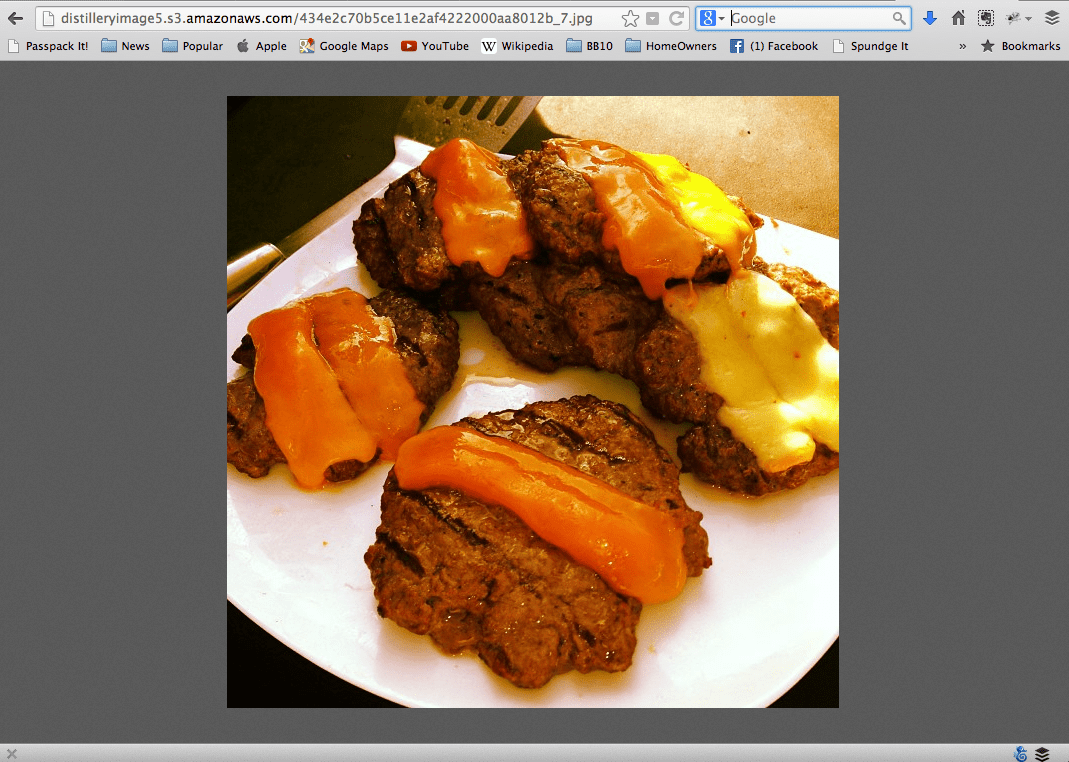
3. The image will now open in a new tab, where you can easily save the image to your computer and re-post to your social profile:
You can now easily add the photo to your gallery or send it out to your fans.
Method #2 – Slightly More Technical
1. Make sure you have the photo opened in a new tab.
2. Right Click on the photo and click the “Inspect Element” button:

3. Click the Resources tab, shown in the red circle.

4. Click the dropdown arrows for the Frames Folder and then the (instagram.com/) folder.

5. Click the 4th item in the (instagram.com/) folder to bring the image up to the right.

5. Scroll down on the image box and click the link at the bottom (shown by the big red arrow).

6. Save your picture from this link!
Now that we know how to save a photo from Instagram, we can start posting it on your various social networks to increase engagement from your followers and add diversity to your current online marketing content.
Just be sure to give credit to the original poster. They will love that you shared their picture and the fans that see it will love the fact that your brand pays close attention to its followers!


