The WordPress SEO Checklist

This week I spent a great deal of time looking through the best-performing Honeypot blogs and ensuring they were optimized for 2018. In addition to updating old links and processes (so that they all made sense), this also entailed optimizing the keywords for the post.
Since I’ve been so focused on SEO lately, I decided to create a (very) basic checklist for WordPress.
I’ve decided to call it…

Note: we use the Yoast WordPress plugin, and I recommend that you do the same. It helps guide you toward an optimized page with ease, and I’ll be referring to it throughout this checklist.
Let’s get right to it.
Your WordPress SEO Checklist, Step-by-Step
Step 1: Set Your Focus Keyword
This is where you’ll set the stage for your post. Which 3-5 words best describe what you’re writing about? Grab keyword ideas from a trusted tool (like the Moz Keyword Explorer) and type the one with the highest volume and lowest difficulty in the ‘Focus Keyword’ section of Yoast. It can grade you on how well you’re integrating the phrase into your post.
Step 2: Incorporate the Keyword into Your Title
Make this detailed, yet clear. The title should include your focus keywords in a digestible fashion.
Remember that the "Title" field at the top of the post doesn't have to be the "SEO Title" that you set in the Yoast plugin. The regular title field dictates what shows up on your website internally.
Step 3: Write a Compelling SEO Title

This is the title you see in search results. The SEO title is in the link you click to get on a site, while the actual post title is visible once you click through to the page.
It’s very important that this title includes your keywords as well. This is one of the most important things search engines look at when ranking your page, and why this is item #3 on the WordPress SEO checklist. Don't forget it!
Step 4: Include Tags
Tags are not only a good way for you to stay organized, but they're also a very simple way for you to emphasize (to search engines) what you’re writing about. Tags also help people find your post with internal site searches, making this a cost-effective remarketing tactic.
Step 5: Write Alt Text for Images
Alt text serves two purposes. First, it enables the seeing-impaired to hear what your image displays. As the page is read to them, the alt text is also read to give them an idea of what the photos on your page depict.
Search engines also scan alt text to read what the image is about to see if it's relevant. If these photos are (according to their alt text) relevant to your focus keyword, they will improve your rank for said keyword.
Step 6: Shorten the Slug
This is the extension of the homepage URL that is specific to the page you're writing. For instance, the slug of the URL on this page is: "wordpress-seo-checklist."

Here's another example of slug of a URL.
This helps with SEO, and it also makes it easier for people to find and share your link.
Step 7: Write the Meta Description
The meta description is the short paragraph underneath the SEO title that offers more detail.

Yoast helps you keep your meta description short enough so that it isn't cut short like this one.
Although the meta description has a debatable direct contribution to modern search engines, it’s also the best spot to hook readers into clicking your link with some good, old-fashioned copywriting.
Check out this great link for a detailed guide on meta keywords!
Step 8: Set the H2 Headers

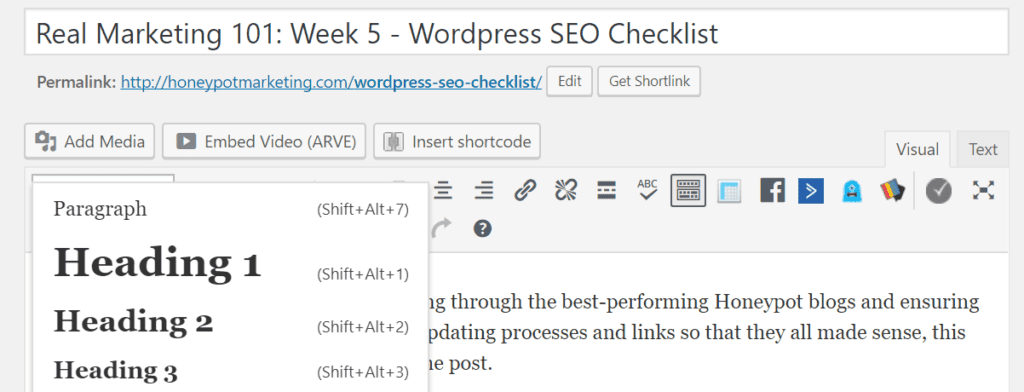
H2 (Heading 2) refers to headings with the second-most importance in the heading hierarchy. The only H1 on your page should be your title since it’s the most important summary of your content. Every major section header of your page should be styled as an H2.
Step 9: Set Some H3 Headers
From there, the subtitles underneath each H2 should be H3s. Search engines take these heading sizes into account when deciding on the overarching themes of your post.
In other words, search engines can see that this post is primarily focused on search engine optimization rather than copywriting because I’ve put a greater emphasis on SEO in my main headings.
Step 10: Integrate the Keyword into the Body Copy (Paragraph)
Last, but certainly not least, we have the bulk of the post to optimize. I personally don't stress the SEO in my rough draft; that's the time to focus on getting your message across effectively. However, after you’ve written your post and made all of your points, go back and place your focus keyword in strategic places.
Proceed with caution: you don’t want to sound like a robot. Ask a peer to proof-read what you’ve written to ensure you haven’t repeated certain words too often.
That's it! Don't forget to check the non-SEO boxes on your post (like setting an author, a feature image, and a category), but that's the bulk of what you need to cover for a basic post.
The Free SECRET That The Gurus Won't Share With You!
There are no secrets to SEO.
All of these factors simply contribute to an optimized page or post. Some things like the SEO title and page title carry greater importance, while some things (like the alt text) is less of a deal-breaker.
The important thing to remember is that every little bit counts. Wherever you have the opportunity to improve your search ranking, take advantage. You can bet that everyone else will. Follow this checklist every time you create a page to ensure you’re search-engine-optimized.
Thank you for reading, and good luck on your next post!

... I hope you found it valuable! While we’re on the topic of WordPress, you should check out Week 3 of RM101 to learn the basics of compelling copywriting too.

